Uploading files to an Azure File Share from a Raspberry Pi
How to use the Azure CLI to upload files from a Raspberry Pi to an Azure Storage File Share #
Recently, I used an Azure Storage Account to set up a Cloud file share. My goal was to have a file share that could be mounted across all my computers/phones/tablets (by using SMB) and accessed from anywhere.
Once the file share was set up, I decided I wanted to upload a copy of all the files I have in my home server, a Raspberry Pi running Raspbian.
To do this, I decided to use the Azure CLI, which conveniently has an azure storage file upload-batch function. These were the steps I followed:
Installing the Azure CLI on the Raspberry Pi #
I attempted to install azure-cli using the all-in-one script found in the Azure documentation. However, even though the packages installed, attempting to use them threw an error. There currently aren’t packages for ARM64 architectures, and the packages that the all-in-one installs are mislabeled as ALL, which makes them install but not run. This is tracked in this GitHub issue.
Instead, I used the package found in the pip3 repositories, which does work on ARM64 systems (notice that although there is also an azure-cli package in the Python2’s pip repos, this package failed to install on my system).
First, I installed python3-pip, which also installed python3 and all necessary dependencies:
sudo apt install python3-pip
With pip3 installed, I then installed the azure-cli package:
pip3 install azure-cli
pip3 installs packages in the ~/.local/bin directory, which is not in the $PATH by default. So I also added this line at the end of my .bashrc:
export PATH=$PATH:/home/$USER/.local/bin
Performing the batch upload #
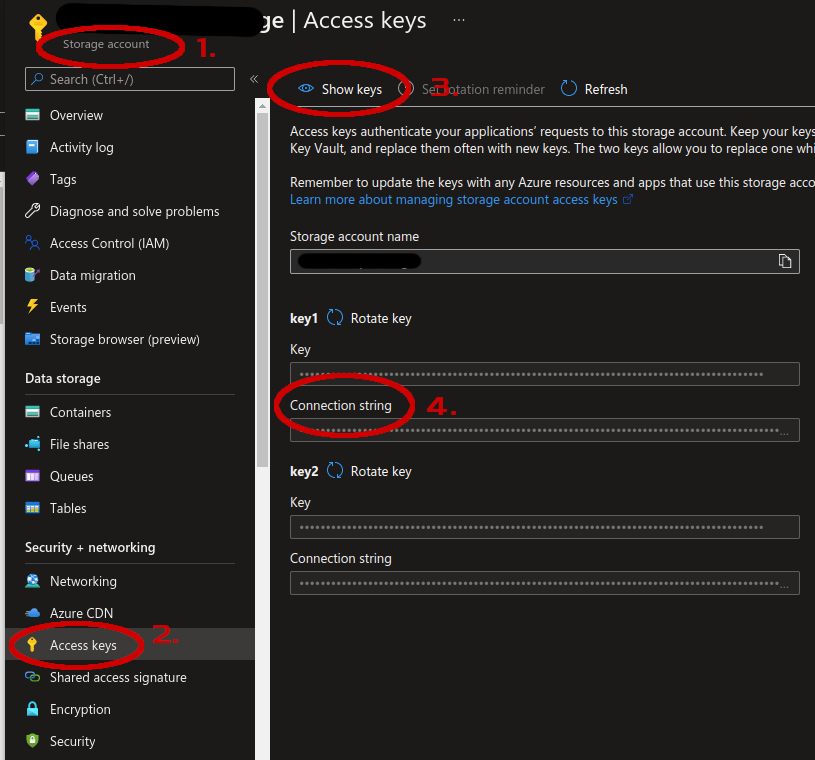
With the az cli installed and ready to go, we can perform the file upload. First, we need to decide which method to use for authenticating to the Storage Account. For my scenario, the easiest way was to use a connection string. To find it, go to the Azure Portal, navigate to your Storage Account, then Access keys, and finally press Show keys:
The rest of the command is pretty self-explanatory. We need to define which File Share to upload to (the -d flag), the local path to upload (the -s flag), and which path to upload to in the File Share (the --destination-path flag; without it, the files will be uploaded to the root of the share). The final command will look like this:
az storage file upload-batch -d FILE_SHARE -s LOCAL/PATH/TO/FOLDER/ \
--destination-path PATH/IN/FILE/SHARE/ --connection-string MY_STRING
Check the documentation if you want to see all of the available flags.
Conclusion #
Remember that the upload is recursive, so all files and subdirectories found in the source path will be uploaded to the share. Also, the upload-batch subcommand does not skip over already present files - it simply overwrites them if they already exist. So this command might not be ideal for syncing directories regularly, like how one might use rsync, for example.
Uploading files from a Raspberry Pi to an Azure File Share is not difficult once all pieces are in place. This process should become even easier once Microsoft releases the ARM64 version of azure-cli.
Did this tip help you out? Let me know in the comments below!